Pages

Showing posts with label vegetables. Show all posts

Tuesday, August 30, 2011

Ratatouille: Or, How I May Be Losing My "I Hate Zucchini" Membership Card

First it was Sautéed Julienned Zucchini. Then it was Zucchini Tomato Slaw with Tennessee Mustard Dressing. Now, Ratatouille. What is wrong with me? I can understand the first two - the first is flash sautéed and the second uncooked with the oh-so-offensive seed cores unused, but ratatouille is, by definition cooked, and for quite a while. For this, I blame Food52. 

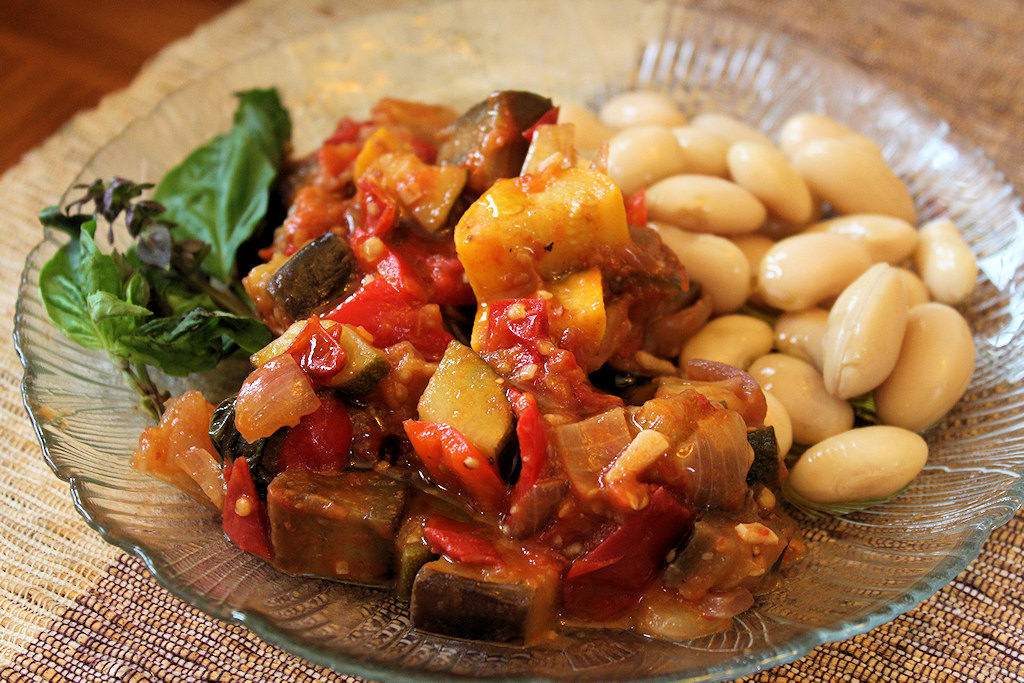
They featured Alice Water's Ratatouille recipe, slightly adapted, in their "Genius Recipes" series (there is some cool stuff there - check it out), during the restaurant's 40th anniversary celebration week and the treatment touched a chord for me. From the picture on the site,it looked: not soupy, not a brown mash, not full of watery zucchini that taste like heated slush - all bad taste memories for me.  

In this preparation, the peppers, onions and (yes) even the zucchini maintain texture, structure and dignity and the flavors of the other vegetables is distinct. This is still true as I eat it this morning (the third day) warmed up, under some scrambled eggs. Finally, the recipe reminded me of pound cake - a pound of tomatoes, a pound of zucchini, a pound of onions, a pound of eggplant, a pound of peppers, plus olive oil, 4-6 cloves of garlic, basil, a pinch of dried chile flakes and salt. Easy to remember. 

Since I used Food52's recipe as is and did not adapt it enough to republish, except to cut the zucchini a little bit larger than the called-for 1/2" dice, I'll refer you to their site for the recipe but will give you some notes in the pictures below, on the preparation.

Preparation Notes & Photos                                                                                                                 
 
The only quibble I have with this recipe is how the quantity of basil is described:
  • 1/2 bunch of basil, tied in a bouquet with kitchen twine + 6 basil leaves, chopped

What is a "bunch of basil"? Small differences likely don't matter but a bunch can be few stems or a fist-full. During summer, especially at farmers markets, basil is plentiful and the bunches I buy are huge. If I purchased a plastic clam shell  package of fresh basil from my local corporate grocery store, it's a much, much smaller amount and may not have been enough. If I'd used half of the giant bunch of basil from the farmers market, I think it would have overwhelmed the dish.
I used yellow and green zucchini, Early Girl tomatoes, 2 small red onions, 1 medium yellow onion,
red Italian sweet peppers and 3 small eggplants and basil
I used this much basil and while the flavor permeates the dish, it doesn't overpower. To the right is the eggplant which is cooked first, caramelized, and then removed to be added back later.
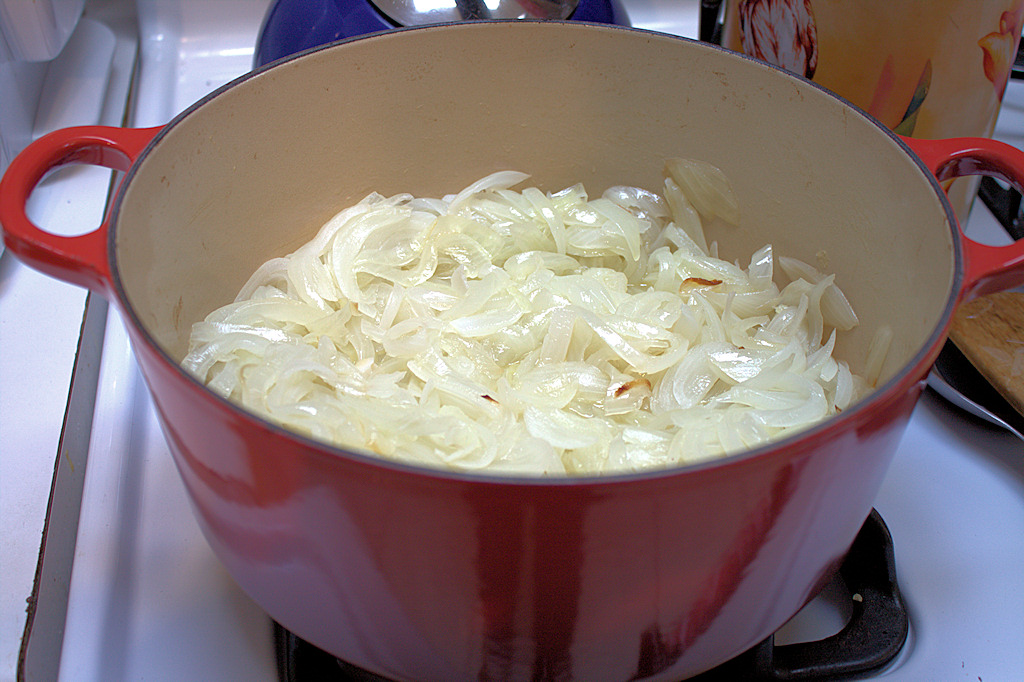
The onions are colored mostly from bringing up the fond after cooking the eggplant with a little (very) color from cooking. I like making a spot for my garlic so that it actually cooks with pans' heat rather than throwing it in to steam with the other ingredients. That's a tip I picked up watching Lidia Bastianich. I used six cloves but it absolutely doesn't overwhelm the dish and cooked it to a very, very pale straw color
I cooked the onions, garlic and chile flakes before I added the basil (a slight departure from the recipe) and then, as the recipe states, added each of the following, cooking for a few minutes before adding the next ingredient: peppers, summer squash and tomatoes. Lastly, the eggplant is returned to the pan and the dish is cooked for 10-15 minutes before the basil is removed and the seasoning adjusted.

Wednesday, August 24, 2011

Spoon Salad: It's Crunch Time

Spoon Salad: this time with cucumber, celery, carrots, scallions, zucchini, red bell pepper, breakfast radishes and snap peas

Spoon Salad?
Spoon salad is my name for a combination of raw vegetables cut up so that you can eat it with a spoon, with a good 'refrigerator life' that I make weekly and mix with, at the time I prepare it, a variety of other vegetables (those that don't store well), herbs, grains, nuts, beans, dairy, meat, fish and/or tofu. The creativity is in how it's dressed and the 'mix-ins'. The base vegetables change somewhat by season. Every once in a while, I'll use it as a base for a speedy saute or stir fry. I just don't get tired of it.

This salad is capital-C CRUNCHY! I love the freshness and the taste. It's filling and wicked good for you. It is also great for developing and improving knife skills. I have tried cutting some vegetables in the food processor but overall, it takes less time to do it by hand and in some cases, using a food processor creates too much liquid. I recommend a small dice (1/4") for carrots or other hard vegetables and 1/3 to 1/2 inch for other less hard vegetables.

If there's a vegetable you want to use and you don't know if will keep for a few days, prepare some and add it to a separate container. Check on it each day. If it gets a little liquid-y in the container, it's probably not a good candidate. If you are considering becoming a Spoon Salad convert, think about how and when you'll use it. Once you've diced up the vegetables, you've pretty much made a commitment and you may want to start by making just a few cups at a time.
 
There really are no rules, but these:
  • The vegetables are cut so that you can eat the salad with a spoon
  • Don't use any 'watery' vegetables - this is a salad that should last in the refrigerator, if stored properly, for up to five days. I've gone as long as seven days with no discernible degradation of appearance or flavor. Anything like tomatoes, seedy cucumbers or other vegetables that are likely to break down quickly should not be included in the 'base' but may be added at the time you assemble it for a meal. One exception is English or Persian cucumbers - they tend to hold up well.
  • Make sure the vegetables are well washed when you start and as dry as possible before you assemble and store the salad - and by that I mean no or very, very little residual water left over from washing when you start to prep and dice the ingredients.
  • It should be very, very colorful
  • Store it in airtight containers - I store mine in several 4-cup plastic containers
You may or may not want to add scallions to your 'base', but I find that onions or shallots (if you wish to use those) should be added as 'mix-ins' at the time you're assembling your meal or dish. It travels well.

Ingredients I Use Include:

Tuesday, July 19, 2011

Hot Day? Turn on the Oven: Oven-Carmelized Onions

1/2 an onion down, 5 1/2 to go
No matter how this turns out, my house smells like heaven right now - if heaven is full of onions and butter (and why shouldn't it be?).

I always seem to find some cooking project when it gets hot that requires the oven to be set at 400 F and run for several hours (insert .wav of Nancy Kerrigan wailing, "Why? Why?").

Since I like to have things made-ahead in my (freezer) pantry whenever it makes sense, one of the things I wanted to have are some caramelized onions.

I am following the America's Test Kitchen oven method that comes with their "Best French Onion Soup" recipe.
6 onions - ready to go in the oven.

By freezing them, I know I'll lose some texture and flavor, but they won't need to last that long because I can find many uses for them. I love roasting vegetables: asparagus, Brussels sprouts, cauliflower, broccoli, etc. and all of the above would benefit from some caramelized onions.

I saute a lot of greens - same dealio. I eat a lot of salads (heavy on the vegetables, light on the lettuce) - ditto. Hell, I'd eat caramelized onions out of a bowl. Shhh... I'm thinking about grilled baguette slices topped with some of these onions, goat cheese and sprinkled with thyme leaves. Or on top of a grilled steak.

By using olive oil instead of butter, you can make it vegan.
After 1 hour
After 2 hours
After 2 hours, 45 minutes. Looks kinda scary but it's not done yet.
Better. Scrape, scrape, scrape. There are some bits that look burned but I tasted a couple of them (okay, I did a lot of tasting) and they were just fine. This shot was taken right before I added the 1/4 cup of brandy.
Ahh...

Recipe: Oven-Caramelized Onions

Tuesday, April 5, 2011

Roasted Radishes: Good News/Bad News

"RUN! RUN BEFORE IT'S TOO LATE!
My kingdom for opposable thumbs!  Or legs!"
(Yes, these are the radishes speaking)
Good news: I really liked the greens.

Bad news: Roasted radishes remind me of roasted chunks of zucchini and do not even taste like radishes.

Do not want.

I did some research and pulled the recipe from a trusted source - still trusted - but figure this is a "chacun à son goût" difference of taste.

My advice is, don't throw your radish greens out - sauteing or roasting the greens is a good idea. Leave your radishes in the crisper and eat them raw - or pickle them.  If I ever do this again, I'll crank up the heat and just cook them long enough for some color, sauteing the greens separately - or I'll roast the greens 'til just crispy (they were very good!). The likelihood of me roasting radishes again is - oh - somewhere around exactly "hell no".

If you want to give this a shot, go for it. Believe me, I'd love to find out I was doing this wrong as my love of roasted things knows no bounds. In the mean time, I'm going to dream of sliced breakfast radishes on a baguette spread with sweet butter and sprinkled with sea salt.

Thursday, March 17, 2011

Celery Root Stock

Whoa.

So I had two celery roots in my crisper and decided to cube and roast them up.  Celery root is the hairless cat of vegetables.  While a hairless cat may be a lovable, sweet kitteh, you kind of have to WANT to love it when you see it in its original form.  You can see a picture of it (celery root, a/k/a celeraic and not a hairless cat), pre-trimming here - thanks to H-bomb's Flickr pic. In fact the celeraic shown in this photo aren't as gnarly looking as some I've seen.
I trimmed and cubed them and was getting ready to dump the decidedly un-lovely trimmings in the compost bin when I thought, "Hey, would this make good stock?".  I heated up some olive oil in my 5-qt. Le Creuset, threw the trimmings in with a pinch of salt and caramelized them a bit. After a while I added a couple of quarts plus some extra of near-boiling water, brought it to a boil, turned it down to a simmer and popped the lid on.  That was about 2 hours ago.


I took it off heat at about 3.5 hours in, removed the schmutz and when it cooled down a little, strained it through a quadruple layer of cheesecloth (I scrubbed the celery root before trimming but there was still some dirt in the nooks and crannies - make sure there are no darker particulates in your stock).  I thought about reducing it but I like the delicate flavor. 

Friday, February 25, 2011

Thoughts on Kale De-Stemming and Pre-Cooking

De-Stemming.

I eat a lot of kale - both cooked and raw. I am lucky to be able to get it year 'round at farmers markets.  The size varies by season.  Right now (February) the stems are generally pretty short (5-7") from stem-end to tip of the leaf, but during the warmer months, very often twice that - or more. Every week I cook up a bunch (or two) to store in the fridge for daily use or use it in a few dishes or a salad.  Many recipes advise you to de-stem by cutting out the stem from the entire leaf.  If I am going to use only four leaves of kale this is fine, but if I am de-stemming two large bunches, I start to feel a little stab-y.

Sometimes I just cut off the woody part of the stems from the bottom of the leaf and don't bother with de-stemming.  If the leaves are tender, it's just not necessary.  I have tasted the stems and as long as it's not woody or stringy, they are generally tender enough, especially if cooked.

How to De-Stem Kale

Wednesday, February 23, 2011

Raw Kale Salad with Meyer Lemon Vinaigrette

I first ate this at Seester #1's house one Thanksgiving and I was well and truly hooked. There have been weeks where I ate this five days in a row.  Sometimes I wash, dry and prep the kale and then wrap it in a length of paper towel, then store it in a plastic bag.  It will stay fresh for several days.

I most often see this kale labelled as "Dino" because of the pebbled surface of the leaves.  There are many types of kale, but this is my favorite and I can't imagine making this salad with any other type. See: Kale (Wikipedia) and Google Image search for "kale varieties".

Tuesday, February 22, 2011

Baked Corn Pudding: Simple and Delicious

This recipe has been updated, see: Baked Corn Pudding - Version2: Updated and Improved

No cream, no aromatics, no bacon, no cheese (gasp!).  Corn, butter, salt. and pepper.  Eat it and be happy.

Ingredients
  • 6 ears fresh corn
  • 2 tsp kosher salt (1 tsp iodized salt)
  • 4 tbsp unsalted butter + more for greasing the baking dish
  • 1/4 tsp kosher salt  (a small pinch iodized salt) for the top
  • Pepper to taste


Equipment:
  • Box grater or corn creamer
  • A big, wide bowl in which to grate the corn
  • 8" square baking dish, greased with butter (compare the a volume of corn to the volume of your baking dish before greasing it - use a smaller or larger size baking dish as necessary)


Instructions
  • Preheat oven to 400 F (204 C)
  • Using the box grater, remove the meat and juices from each of the ears working very close to the cob - you want this to be very mushy and milky.  For me, cutting the ears in half makes them easier to handle.  Once you have finished the corn, season with salt and pepper, tasting the mixture.
  • Pour the corn mixture into the baking pan.  Smooth out the top and dot with butter.  Sprinkle the top with the additional salt.
  • Bake on the middle rack at 400 F uncovered for 45-50 minutes (start checking it at 40 minutes), or until the top is golden brown around the sides and the corn is bubbling.  Remove from the oven and let it rest for a few minutes before serving.

Brussels Sprouts with White Beans and Pecorino

This is a Thanksgiving "must have" for me.

From: Epicurious: Bon Appetit, November 2005
Serves: 6 as a side dish.

4 tbsp extra-virgin olive oil, divided
1 pounds brussels sprouts, trimmed, cut in half lengthwise
3 garlic cloves, chopped
1/2 cup low-salt chicken broth (or water, for a vegetarian dish)
1/2 15-ounce can cannellini (white kidney beans), drained
1 tbsp butter
1/2 cup coarsely grated young pecorino like Pecorino Toscano


Method:
Heat 1.5 tablespoons oil in heavy large skillet over high heat. When just about to smoke, add half of the brussels sprouts. Cook until brown, stirring occasionally, about 5 minutes. Transfer to large bowl. Heat 1.5 tablespoons oil in same skillet. Add remaining brussels sprouts, reduce heat to medium-high, and cook until brown, stirring occasionally, about 5 minutes. Transfer brussels sprouts to same bowl.

Add remaining oil to skillet; increase heat to high. Add garlic; sauté until brown, stirring constantly, about 1 minute. Add broth and brussels sprouts. Cook until brussels sprouts are crisp-tender, stirring frequently, about 3 minutes. Add beans and butter; stir until butter melts and broth is reduced to glaze, about 1 minute. Season with salt and pepper. Take off-heat and stir in the cheese.